Friday, June 2, 2023

Once a nerd.....

OK, I just have to share this with someone! I am feeling ridiculously proud of myself. A little background - I have been following Karen Montgomery on the Nine Patch A Day group on Facebook. She occasionally designs a quilt and shares the pattern with the group. Back in July, 2022 she posted the directions for a Lottery Quilt. It is an easy, scrappy quilt made out of rectangles. The idea is that you use the daily lottery number to decide what color fabric to put where. Each number 0 - 9 is assigned to a color. For example, if number 3 is assigned to red, 7 assigned to blue and 9 assigned to purple, then the number 379 would be represented by a block with a red, a blue and a purple strip, in that order.

The actual directions use a 5 digit daily number, and either 1 1/2 x 5, 2 x 8 or 2 1/2 x 10 1/2 inch strips, depending on how big you want to finished quilt to be.

It looked like a great way to use up some scraps, so I decided to play along. I opened my scrap bin and cut a bunch of various colored 2 x 8 inch strips.

I made the first block on July 1st, made the second block on July 2nd, and so on for about the first week. Then I missed a day for one reason or another. 'No worries, I'll catch up', I thought ..... Well, months later and I am waaaay behind. Once I fell behind, it just felt too overwhelming to go back and find all the numbers, write them down, convert them to the correct color, figure out how many strips I needed, etc. So the lottery quilt languished on the back-burner. But I don't want another UFO, so I am determined to finish it.

Today, while I was trying to figure out a quick and easy way to organize the numbers and convert them to the correct colors, it hit me! I could make a spreadsheet! I used to use spreadsheets all the time when I was working, but I haven't had an occasion to use my skills since I retired. I wasn't sure that I'd remember how, but everything came back pretty quickly. I opened the lottery website and found the history page. This is a cool feature that lets you see the numbers for any given period of time. Since I had already made the blocks for the first couple of weeks of July, 2022, I decided to continue where I left off.

I copied the dates and corresponding numbers to the clipboard, opened Excel, and imported the numbers into a new spreadsheet using the 'convert text to columns wizard' to make sure that each number pasted into it's own column. Then I used conditional formatting to make each number into the appropriate color. TA-DA! Now all I have to do is is glance at the spreadsheet to know which color to sew where!

Yep, once a nerd, always a nerd!


Saturday, March 18, 2023

Project Quilting 14.6 - Conquer a Fear

 The challenge this week has to involve conquering something that scares you.  

"You see, to grow you must face fears. It’s the way to achieve and succeed. If you only do what’s safe and comfy, you’ll stagnate and grow soft. The way forward is always by finding and following a new path. Growth. So this week, you will confront something you fear. Your project must be about growing through exploring the unknown. 

That all sounds very philosophical and, to tell the truth, pretty vague.  I really prefer a concrete topic for the challenges.  But I guess that is why they call them 'challenges'!

I thought long and hard and realized that I really am not truly afraid of anything.  I have healthy respect for some things, especially those that could hurt me,  but I don't have any irrational fears.  But the challenge seems to be about more than actual fear.  The words worry and anxiety are also used.  So the challenge can be interpreted to mean doing something that makes you uncomfortable, and growing through that. 

When it comes to quilting, I am game for pretty much anything.  I may not enjoy some techniques, but I am willing to try them.  Foundation paper piecing, for example.  I have tried it half a dozen times,  and I honestly just don't like it.  And life is too short to do things that you don't like if there are alternatives!

So where does that leave me for this week's challenge?   One of the examples of an anxiety to be overcome that was given as an example is using curved piecing in a project.  Since I haven't done much curved piecing I started thinking that that would be a possibility for my challenge this week.  It  would definitely be a growth opportunity.

Then, as I was reading through my email on Monday, I came across the Bernina "WeAllSew" newsletter.  One of the articles was on curved piecing.  But it was the picture in the article that really caught my eye:


I'm seeing a pattern here! Curved piecing it is!

The last time I did any curved piecing, it was in a workshop where the result was SUPPOSED to be wonky.  So I decided that for this challenge, I would attempt to do a block that requires precision piecing. 

I chose the Drunkard's Path block because there is only one curve in each block, and you can make some really cool patterns with it. 

After cutting out the pieces, I remembered why I haven't done more curved piecing.  It's not the sewing, it's the cutting!  Unlike blocks with straight lines, which you can cut in almost infinite sizes with a ruler, you need a separate template for each size of Drunkard's Path block.  

I only have one ruler that allows me to cut out Drunkard's Path blocks and I didn't want to draft my own templates.  I made a couple blocks to see how they would turn out.  The test blocks ended up finishing at a really weird size - 3 3/4 inches.  If I wanted to finish my project within the week, there was no way that I could finish a baby quilt like I had originally planned.  So, plan B again! 

I decided to make another placemat for my guild's charity project.  Once I had cut out 4 sets of 4 matching blocks, I got very tired of cutting around the curves.  So I decided that whatever project I made was going to use 16 blocks!  

Sewing them together was surprisingly not too difficult.  I pinned the heck out of the first few, then just pinned the center for the rest.  Once I had them done, I started playing with the layout.  My favorite was a 4 x 4 grid because it emphasized the circle in the center.  Then I remembered that I was making a placemat.  Hmmm..... the placemats are ideally supposed to be 13 X 17 inches,  but when I laid the blocks out to make a rectangle, it was 11 3/4 inches by 18 3/4 inches,  And then I had an extra block, and I just couldn't find a layout that I liked.


OK, plan C?  I decided to use my favorite  4 x 4 grid.   The grid finishes at 15 inches square, which is too small for a table topper and too large for a potholder.... so it became a pillow cover! 
 

I found that I am not afraid of curves, I'm just not particularly fond of them.  I would do them again, given the right project. I also realized that the biggest anxiety that I experienced this week was the fear that I wouldn't finish on time!!

Project Quilting is successfully completed for another year.  Looking forward to season 15!


Sunday, March 5, 2023

When Harry met...Jane?

 Project Quilting 14.4 continued

I had decided to use the Harry’s Star block for the 4th Project Quilting Challenge this year.  The theme was “A Novel Project”, and the challenge was to use a novel that you had read as inspiration.  After many frustrating attempts, I gave up and made a potholder.  If you are interested, you can read about that fiasco a couple of posts back.  It's titled "Project Quilting 14.4 or How Harry Potter became The Last Unicorn."

Harry's Star block

Even though I was tempted to wad up the blocks and throw them in a corner,  at the end of the week I had cooled down a little.  I didn’t want to just abandon the blocks, but  also didn’t want to add to my pile of UFOs, so I continued to work on the blocks in the week between challenges.  Since the next challenge week was super busy again, I made another quick project and then got back to Harry, as I had started calling it.  

By the time I had all the blocks finished, I realized that there were 28 blocks, not 24 like I had originally calculated.  Harry was definitely a problem child!  The fat eight bundle that I used was called "Hello Jane" by Allison Harris, and it must have had more fat eights than I originally thought.  I had set aside two of the fat eights to cut up for the binding, and just made blocks out of the rest. In all the confusion and stress with trying to finish in time to use Harry as my entry for 14.4, I didn't realize that I would have more blocks than I needed if I used all the fat eights. 

After mulling it over,  I realized that having the extra blocks was a good thing. I had originally thought that I would have to cobble an extra block together out of the left overs from the other blocks in order to have my planned 40 inch square quilt.  Now that I had 28, that problem was solved. Having more blocks to play with actually worked out quite well. 

I arranged the blocks in a 5 x 5 straight set on my design wall.  During the next few days, every time I walked by, I would check to see if I liked the layout.  If two side by side blocks were too similar for my taste, or if  similar colors were too close together, I  switched blocks around, sometimes substituting one of the extras.  I wouldn't have been able to do that as well without the extras.

Once I was satisfied, I sewed the blocks together and considered what to do with the extras.  I could always throw them into my orphan block bin, but ultimately decided to use them on the back.  I pieced them into the backing in a diagonal row down the middle, then did a simple straight line diagonal quilting pattern.  The batting that I used says that you can quilt up to eight inches apart.  By starting a quilting line in every other square, the resulting diamonds are eight inches, point to point!  Harry was starting to behave! 

I cut each of the two set-aside fat eights into 4 strips, 2 1/4" x ~21" each, to use for the binding.   I sewed sets of matching strips together to make four binding pieces 2 1/4 X ~ 41".  Since Harry is 40" on each side, this was going to be tight!    I planned to use one piece on each side,  putting one color on the top and bottom and the other on the sides.  However, once I laid out the binding, I realized that there wouldn't be enough of an overlap at the corners to do the mitering.  Instead, I placed the color changes at the midpoints, and used straight seams instead of diagonal ones to join the binding strips so that the color change happens right at the centers.    It's easier to see what I mean on the back of the quilt.  If you look at the center top, you'll see that the binding changes color.  Likewise at the bottom, and on both sides.

Extra blocks set diagonally on the back 

'Harry', using Hello Jane fabrics by Allison Harris for Cluck Cluck Sew, Windham Fabrics

I've become quite fond of Harry.  Sometimes it is the 'problem children' that become the favorites, maybe because of all the trouble that they give us.  I think that Harry falls into that category!

Wednesday, March 1, 2023

Project Quilting 14.5 - Sew Not a Square

This week's challenge is to make anything you want - as long as it isn't a square!  But the rules stipulate that you can't USE any squares either! It sounds difficult at first, because let's face it, most quilt blocks are square.  But once you think about it, there are many traditional quilt patterns that don't use squares.  Grandmother's Flower Garden quilt is made with hexagons.  Thousand Pyramids?  Triangles.  Tumbling blocks?  Diamonds.  Majestic Mountains?  Well that one isn't a simple shape, it is more like a series of similar shapes.  But the point is, there are tons of possible 'not square' quilts.  But the challenge doesn't limit the entries to traditional quilts.  You could make a purse, zipper pouch or a tote bag.  A quilted vest, or a jacket.  The problem with a challenge like this is that there are so many possibilities that it is really hard to choose just one. I could literally spend a few days just trying to figure out what to make.  

But I learned my lesson with the last challenge - if I have  a lot time commitments during challenge week, then I need to do a smaller project. Even though I was planning to make a baby quilt for each challenge, I knew that this week would be an especially challenging one to get a baby quilt done.  I looked at the calendar and realized that I have major commitments on 6 of the 7 days. So a baby quilt is not going to happen this week.  

But what kind of small project could I make? There's always potholders, mug rugs, etc.  Boring, but useful. And I have made ones that are circular, hexagonal, octagonal and rectangular.   All sew not square!  Then I remembered that the guild that I belong to is doing a community service project this year, making placemats for a local service that delivers meals to the homebound. That's it!  Placemats are usually rectangular, and I was sure that I could get at least one placemat done in the little bit of time that I had between the other commitments.   

Now the problem was - what to use as the pattern?  A lot of the other guild members are using up orphan blocks and adding fabric to the sides.  The problem with that, of course, is that orphan blocks are generally square which rules them out for this challenge. 

So I started through my bookshelf, searching for inspiration.  I found the book French Braid Quilts and knew that I had my answer!  I recently did a purge of quilting books, but kept that one because a braided quilt has been on my bucket list for quite awhile.  A bonus to using them for this challenge is that making a small project with a given technique is a good way for me to decide if I like it enough to make something bigger. 

Since I am trying to use up stash, I grabbed the bin of 6 inch squares which were given to me a few years ago.  They are a real mish-mash of colors and styles, so I started sorting them by color.  I didn't want to take the time to find a sashing or border fabric for each placemat, so I decided to use some leftover strips from a black Kona fabric roll.

I cobbled together seven greys, seven black and whites, and seven red and black squares that would go well with the black. Then I cut three 2 inch strips from each 6 inch square and started sewing them together by color.  

After sewing together all 21 strips from each color grouping, I had 3 braids about 25 inches long each.  Since the braid technique makes a chevron, or arrow shape, I cut off the excess on the indented 'v" ends to make them even. Then I sewed the two cut-off pieces onto the sides of the pointy end to fill in the edges.  After squaring up the top and sides, I ended up  with rectangular braids  about 22 inches long and 7 inches wide.  


Red/Black Unfinished

I then cut each braid into two 11 x 7 inch rectangles, sewed a 2 inch wide piece of the black between them as sashing, and added 2 inch strips as a border.  This resulted in rectangles about 14 x 18 inches, which is a nice size for a placemat. 


Black/White Unfinished


Since I really only needed one placemat for this challenge, I chose the grey one to finish first.  No real reason, except the fact that I already had grey thread on my machine! The other ones will be completed before the guild collects them in April.


I did some easy stitch in the ditch quilting with just the top and the batting, then sewed on the backing envelope style.  I trimmed off the excess batting next to the stitching to reduce the bulk on the edges, turned it, then stitched all the way around 1/8 inch away from the edges to close the opening and give it a nice edge. 

French Braid Placemat

Voila! One NOT square placemat - boring, but done!

Friday, February 17, 2023

Project Quilting 14.4 or How Harry Potter became The Last Unicorn

I was intrigued when I saw the subject of this week's challenge.  I have always loved reading.  I can get lost in a book and hours go by without me even realizing it.  My favorite genre is Science Fiction and Fantasy. 

Because I wanted to continue making baby quilts for the challenges, I tried to think of a traditional quilt block that I could associate with a book that I'd read.  Nothing jumped out at me, so I grabbed my copy of Maggie Malone's 5,500 Quilt Block Designs and started through the index.  I figured that there had to be at least one of the 5,500 quilt blocks that reminded me of a book!  

I actually found several that could work.  For example, 'Card Trick' reminded me of the Queen of Hearts in Alice's Adventures in Wonderland.  The problem was that I'm not sure that I ever read the book, or if I just remembered the Queen from the Disney movie!  The same issue came up with several other blocks - I was familiar with the books, but I had never actually read them.  

Then I found it!!! 'Harry's Star'!  I have read all of the Harry Potter books several times and I loved them.  My kids and I would anxiously wait for the next book in the series, and then pass them around.  It was really hard not to talk about the books until we had all read them!

Harry's Star is a directional block that uses two fabrics and a background so I originally thought about making it scrappy.  The problem with that was that I didn't want to waste time digging through my scrap bin for coordinating sets of scraps that were big enough.  Then I remembered that I had several fat eight packs that I had gotten from a Quilty Box subscription that I had before they suspended operations.  I grabbed one of those and did some quick calculations.  I could make four 8 inch blocks from each set of two fat eighths and some background fabric, so a 40 inch baby quilt was feasible from the fat eighth pack.

All the above happened on Sunday after the announcement of the challenge, so I was feeling optimistic about getting another baby quilt done.  That optimism was soon to change. 

On Monday morning, I got up and started cutting and sewing with absolutely no thought that I wouldn't be able to get this project done on time.  Sure, I knew that I had some events and a few other major time commitments this week, but I finished the other three, didn't I?

Remember how I said that the Harry's Star block is directional? It is a 4x4 block with a pinwheel in the center, 4 matching corners, and 4 half square triangles that complete the 4 point star.  


I don't know why I couldn't keep the Half Square triangles in the correct orientation.  I kept having to rip out seams and starting over.  After I realized that I had made four blocks in a mirror image of the correct orientation, I was ready to throw the whole project away! By the end of the day on Monday, I only had four blocks done correctly.  I was starting to doubt my block choice.   

My daughter asked me whether I was sure this was worth all the aggravation, and suggested that maybe I could turn one block into a potholder.  I resisted that suggestion, because I still had most of the week, and two of those days, I had nothing planned except sewing.  I could do this!

I put the blocks on my design wall for inspiration... only 18 more to go, only 16 more to go, etc.  When my daughter walked by and pointed out that two of the blocks had mistakes, I said some not very nice words.  About the third time I had to rip and resew the same block, I said some VERY not nice words!

My daughter kept walking by and muttering 'potholder'... I pointedly ignored her.  

Reality set in on Wednesday afternoon.  I only had one more full day to finish the top, sandwich and quilt it and sew on the binding.  Even with the few hours that I had available on the other days, it just wasn't going to happen.  I really wanted to keep making baby quilts, but realized that with all the time constraints this week, I made the wrong choice with Harry's Star.  

So, I unenthusiastically started making a Plan B.  Fewer blocks, set off with lots of background?  I wasn't happy with that option, because I really liked the pattern that formed when the blocks were set side by side.  In the end, I decided to put the Harry's Star quilt aside and come up with another idea.  

I was browsing my bookshelves for another idea when I found a copy of one of my favorite books, Peter S. Beagle's novel The Last Unicorn.  OOH, now there was something I could work with! Could I do an applique of a unicorn on a smaller project? How about machine embroidery?  Both of those ideas had their own special problems, but I really thought that I had the solution. I went to bed still thinking about the issue.  In the middle of the night, I woke up and realized that I probably had a piece of novelty fabric with unicorns on it.  I had been collecting novelty fabrics for an I Spy quilt, and I was pretty sure that the U fabric I had was either umbrellas or unicorns.  Since I knew that I wouldn't be able to get back to sleep until I knew for sure which it was, I got up and went into my sewing room. I  rummaged through the bin of novelties and AH HA! Unicorns!  The fabric piece was only about 9 inches square, so it was going to have to be a smaller project. 

I had some commitments on Thursday, but was able to spend a few hours making... yes, a potholder. (sigh)


Tuesday, February 7, 2023

One Charm Pack and one yard of Fabric = a quick and easy baby quilt top

 
First, a few caveats!

I am going to tell you how I did this, but you may need more or less fabric, depending on how wide you like your borders and bindings and how wide your border/binding fabric is. You may also choose to use different border and binding fabrics.  Any of these options will change the amount of fabric needed.   The directions also assume that you know how to make binding, and how to sandwich a top to ready it for quilting.

In order for this to work with just one yard of fabric, the width of the yard of fabric needs to measure at least 40 inches AFTER cutting off the selvedges.  You also need the whole 36 inches.  You may need a bit more if the yard ends are 'wonky' after being cut off the bolt.  That is because you will need to straighten the ends.  Many quilt stores give you an extra inch to allow for this, but the big box stores generally do not.   

Sew the charm pack together in a 6 x7 pattern. Arrange the charms in whatever way you like.  For this nautical themed quilt, the colors were fairly evenly divided, so I was able to set them in diagonal rows.  

The center should measure 27 1/2 by 31 1/2 inches before the borders are added.

Cut the border fabric into four 6 1/2 inch strips for the borders and four 2 1/2 inch strips for the binding.  I like to use 2 1/2 inch binding strips, but you can use 2 1/4 or even 2 inch binding strips if desired. 

Cut one 31 1/2 inch piece from each of two of the border strips and sew them on to the 31 1/2 inch sides of the center. Save the cut-off pieces.

Cut 40 inch pieces from the other two border strips and sew them on to the top and bottom of the center.   

Sew the binding strips together with diagonal seams.  Press the seams open, then fold the strips in half lengthwise and press to form the binding. You will need at least 170 inches of binding (and probably a bit more).

If your fabric is only 40 inches wide, the four binding strips will only be 158 1/2 inches after seaming them together.  You can cut more binding pieces  from the fabric left from the side borders and add it to the binding strips in order to make it long enough.   If you use 2 inch binding, you should be able to cut 5 strips from your yard of fabric, so you will have plenty.

In addition to the charm pack and yard of fabric for the top, you need a backing fabric in order to finish your quilt.   Technically, you only need a backing that is slightly wider and longer than the quilt top, but many people choose to add about 2 inches all around to allow for the shrinkage that happens when it is quilted.   The more densely the top is quilted, the more the shrinkage.  

The selvedges do not need to be cut off the backing fabric before quilting but the fabric width without the selvedges needs to be at least 40 inches.  If you want more wiggle room, you will need to piece the backing.  Since the quilt width and the fabric width are so close, the fabric needed to make the backing wide enough is only a few inches.  Some people choose to add an extra strip of fabric on one side of the backing fabric or the other, but that can result in the seam being very close to the edge and potentially running into the binding seam.  Other people add a strip of contrasting fabric down the center of the backing.  

Another way to make the backing wide enough is to make a diagonally seamed backing.  From what I can tell, John Flynn is the one who came up with the calculation to make figuring out how much fabric you need easy.  You can find the formula here:  https://www.flynnquilt.com/free-lessons.htm.  If you don't want to use pencil and paper, there are several sites that have a calculator and all you have to do is plug in the numbers.  Just do a search for diagonally pieced quilt back calculator and you will find several options.  

My backing fabric was about 42 inches wide with the selvedges, so I chose not to add any width.  I did end up piecing the backing, but I added the extra to the length, not the width.  I had an extra quarter yard of the border fabric that I wanted to use up, so I added it across the center of the back.   I quilted it on my Bernina B590, using a gentle undulating curve with the walking foot to resemble water, or waves.


Nautical Baby Quilt, ~ 40 x 44 inches


Saturday, February 4, 2023

Project Quilting 14.3 - Fifty-Four Forty or Fight

Being a veteran of past Project Quilting seasons, I figured that one of the challenges would involve a specific quilt block.  And sure enough, this week's challenge was to use the traditional, but rather oddly named block 54-40 or Fight!  

There are a number of quilt blocks that were supposedly inspired by political issues, or at least adopted by women to represent their feelings on political issues.   For example, the temperance movement of the late 1800s and early 1900s inspired not just one, but at least two quilt blocks, Temperance and Drunkard's Path. 

Fifty Four Forty or Fight was a slogan from the era when the Oregon Territory was claimed by both the US and the UK.  The boundary of the territory was 54 degrees 40 minutes north latitude.  The US wanted all of the territory, and there was a movement that wanted to fight the UK to ensure that they got it.  Cooler heads ultimately prevailed, and the two countries compromised on the current border at 49 degrees north. 

When I saw that the challenge was a specific block, I knew that this was going to be an easy decision for me.  Another baby quilt!  The only issue was going to be exactly how I was going to use the block.  I'm not particularly fond of blocks that use odd angles, but figured that it would be a learning experience.  

The blog post that Kim posted with some resources for this block was incredibly helpful.  I realized that I actually own the Tri-Recs template that was developed to make the triangle in a square portion of the block, even though I had never used it for that purpose.  And when I watched the video tutorial from the Missouri Star Quilt company, I knew exactly what I was going to do for the challenge.  

I have always been intrigued by quilts that use straight line piecing to produce the illusion of curves. Making one has been on my "one of these days" list. Alternating the Churn Dash block with the 54-40 or Fight block gives that illusion!  Yay, another bucket list item checked off!

I decided that scrappy wasn't going to work well for this quilt, so I did some spelunking in my stash.   I found three separate yards of the same print - one each in purple, bright pink and orange. Why I bought them, and when, is a mystery to me!  The orange and pink are a bit overwhelming, but the purple had definite possibilities.  I used the registration dots on the selvage to find coordinates to use for the blocks. Since the colors are very bright, a white background helped to tame the overall assault on the eyes.   The yard of purple floral was just enough for the border, the binding and the centers of the blocks. 

I used the Missouri Star version of 54-40 or Fight, with the solid center rather than a four patch.  Using the white background fabric in the central triangle and a nice bright yellow for the sides, emphasizes the star that is formed by the four triangle in a square blocks.

Alternating five 12 inch 54-40 or Fight blocks with four Churn Dash blocks plus a 4 inch border yielded a bright happy 44 1/2 inch square baby/toddler quilt.  

Project Quilting 14.3, done!


Friday, January 27, 2023

Rainbow Road


I finished a UFO! This little (30" x 30") quilt has been laying around for 15 years (at least!). I found the fabrics at Walmart many years ago. That was when Walmart actually had a fabric department. Or rather, before they eliminated their fabric department then brought back a much streamlined version. Yeah, I know - they aren't the best quality fabrics. But I couldn't resist the fact that they are all the same print in a rainbow of colors! I only bought a little bit of each - maybe a 1/4 yard? I don't recall exactly.

Back when Walmart had the fabric department, they sponsored a quilt block contest. To enter, you just had to make a 12" square block, any design, and you had to use fabrics purchased at Walmart. Since I had already purchased these prints, I decided to enter. I made a Road to Oklahoma block and made each of the steps a different color, arranged in rainbow order. So I called it Rainbow Road, and entered it at the local Walmart. To my surprise, it won a prize! It wasn't a grand prize, or even a first prize, but it was a prize for the best block at that store! And it came with a $25 gift card. Being a new quilter at the time, I was thrilled!

Now back to this quilt. I decided that I couldn't do anything with just one block, so I made three more. Then I surrounded them with a border of 2 inch finished squares, again in rainbow order. That's when progress ground to a halt. I don't recall exactly why I set it aside, but I suspect that I hit a creative roadblock. It wasn't big enough for a baby quilt, so I didn't know what to do with it.

When I found it in my UFO bin a few years ago, I realized that I didn't have ANY of the fabrics left. Whether I used them or donated them, I'm not sure, but there weren't any to be found in any of my bins. So it went back into the bin for my brain to stew over for awhile.

When Karen Montgomery announced a UFO finishing challenge on her Nine Patch a Day Facebook page,(https://www.facebook.com/groups/380546322967892)

I dug through my bins and, in the process of listing all my UFOs, I discovered it again. I also found many more UFOs, but that will be the subject a different post...

This time, however, I had an answer for how to finish it! I joined the Creative Quilters group that is part of the Quilt Company East Quilt Guild a few years ago. These wonderfully artistic ladies introduced me to the technique of using 'facing' on a quilt rather than binding. Facing a quilt isn't as durable as binding, so it isn't really suitable for quilts that will be used and abused. It is however, the perfect answer for a quilt that will be displayed. A traditional binding stops the eye at the edge, whereas a facing is invisible from the front, so the eye doesn't hit that hard stop. This makes it a great technique for art quilts and other wall-hangings.

If you are interested, APQS has a great video demonstrating the technique:

https://www.apqs.com/how-to-face-a-quilt-with-video/

I found a nice soft yellow print in my stash and used it for both the backing and the facing. I used my walking foot and stitched straight lines on either side of the 'steps', and did gentle curves in the central diamonds and the border. I plan to hang it in my sewing room, because it makes me happy just looking at it!


Saturday, January 21, 2023

Project Quilting 14.2 - Pink Tint

For this week's challenge, the first rule is that some shade of pink must dominate the project.  I have absolutely no problem with that!  Pink is my favorite color, and has been as long as I can remember.  I remember making a 'hot pink' jumper in Home Ec class in 10th grade.  I was absolutely thrilled that the material for a jumper came in that shade.  Looking back, I'm sure it was eye-watering, but it WAS the 60's! 

Humming happily to myself, I dug happily into my stash, trying to figure out what I wanted to use, and what type of project it should be.  Last week, I made a baby quilt. This week was looking to be a quiet one without a lot of commitments, so I decided to make another one.  It's always good to have baby quilts on hand!

I'm trying to use up "stash" so my first criteria for these challenges is to use what I have and not buy anything.  Most of said 'stash' is stored in plastic bins in the basement.  I know that you aren't supposed to store fabric in plastic, but my basement is very dry and no moisture can in to the bins and cause mold, mildew or other nasty fabric-destroyers. Anyway, I headed to the basement to start my fabric spelunking.  

Once there, I came across several shoe box sized bins that contain 'nickels' or 5 inch squares of fabric.   I believe that these nickels were the inspiration for the charm packs that are now made by the fabric companies.  When I first started quilting, I discovered an online group that was dedicated to making the quilts in Pat Speth's Nickel Quilt books.   The group would swap pairs of nickels according to the theme that was decided upon that month.  Sometimes, it was a type of reproduction fabrics, like 30's or Civil War prints.  Sometimes, it was just a color, or a type of color - like brights or pastels. Since I never actually made any of the quilts, my nickels are still stored according to color and theme.  I decided that now was a good time to start using some of them, so I grabbed the bag of pinks.

Now, which pattern?  Since I knew that I was starting with 5 inch squares, I looked through the Nickel Quilt books.  Unfortunately, none of the quilts seemed that they would be adaptable to a quilt that I could finish in a week, so I put them away and kept looking.  

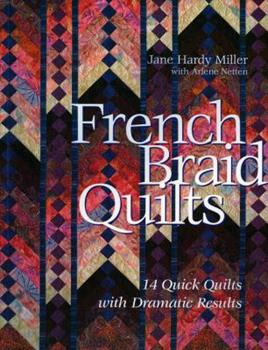
My next thought was that I could use the Accordion Sewn Triangle method, developed by my friend Beth Helfter.  I first encountered Beth when she was a member of the Scrap Squad group put together by Quiltmaker Magazine.  I applied to be a member, but was instead chosen by the editors to be a 'Scrap Addict', which was a group that made scrap quilts from the blocks in Bonnie Hunter's Addicted to Scraps column.  So Beth's tenure at Quiltmaker corresponded with mine, and I've followed Beth ever since.  I have done some pattern testing for her, which resulted in two of my quilts being in her books.  The Accordion Sewn Triangle technique is a way to easily make scrappy half-square triangles from squares.  I pulled out her book Oompah! and saw a star block that I could upsize to use the 5 inch pink squares. (Oh, in case you're wondering - Oompah, accordions... get it? ^.^)

If you want more information about the Accordion Sewn Triangle method, Beth has a couple of videos on You Tube that explain and demonstrate.  The first one is https://www.youtube.com/watch?v=Dc3ClOPu4_w

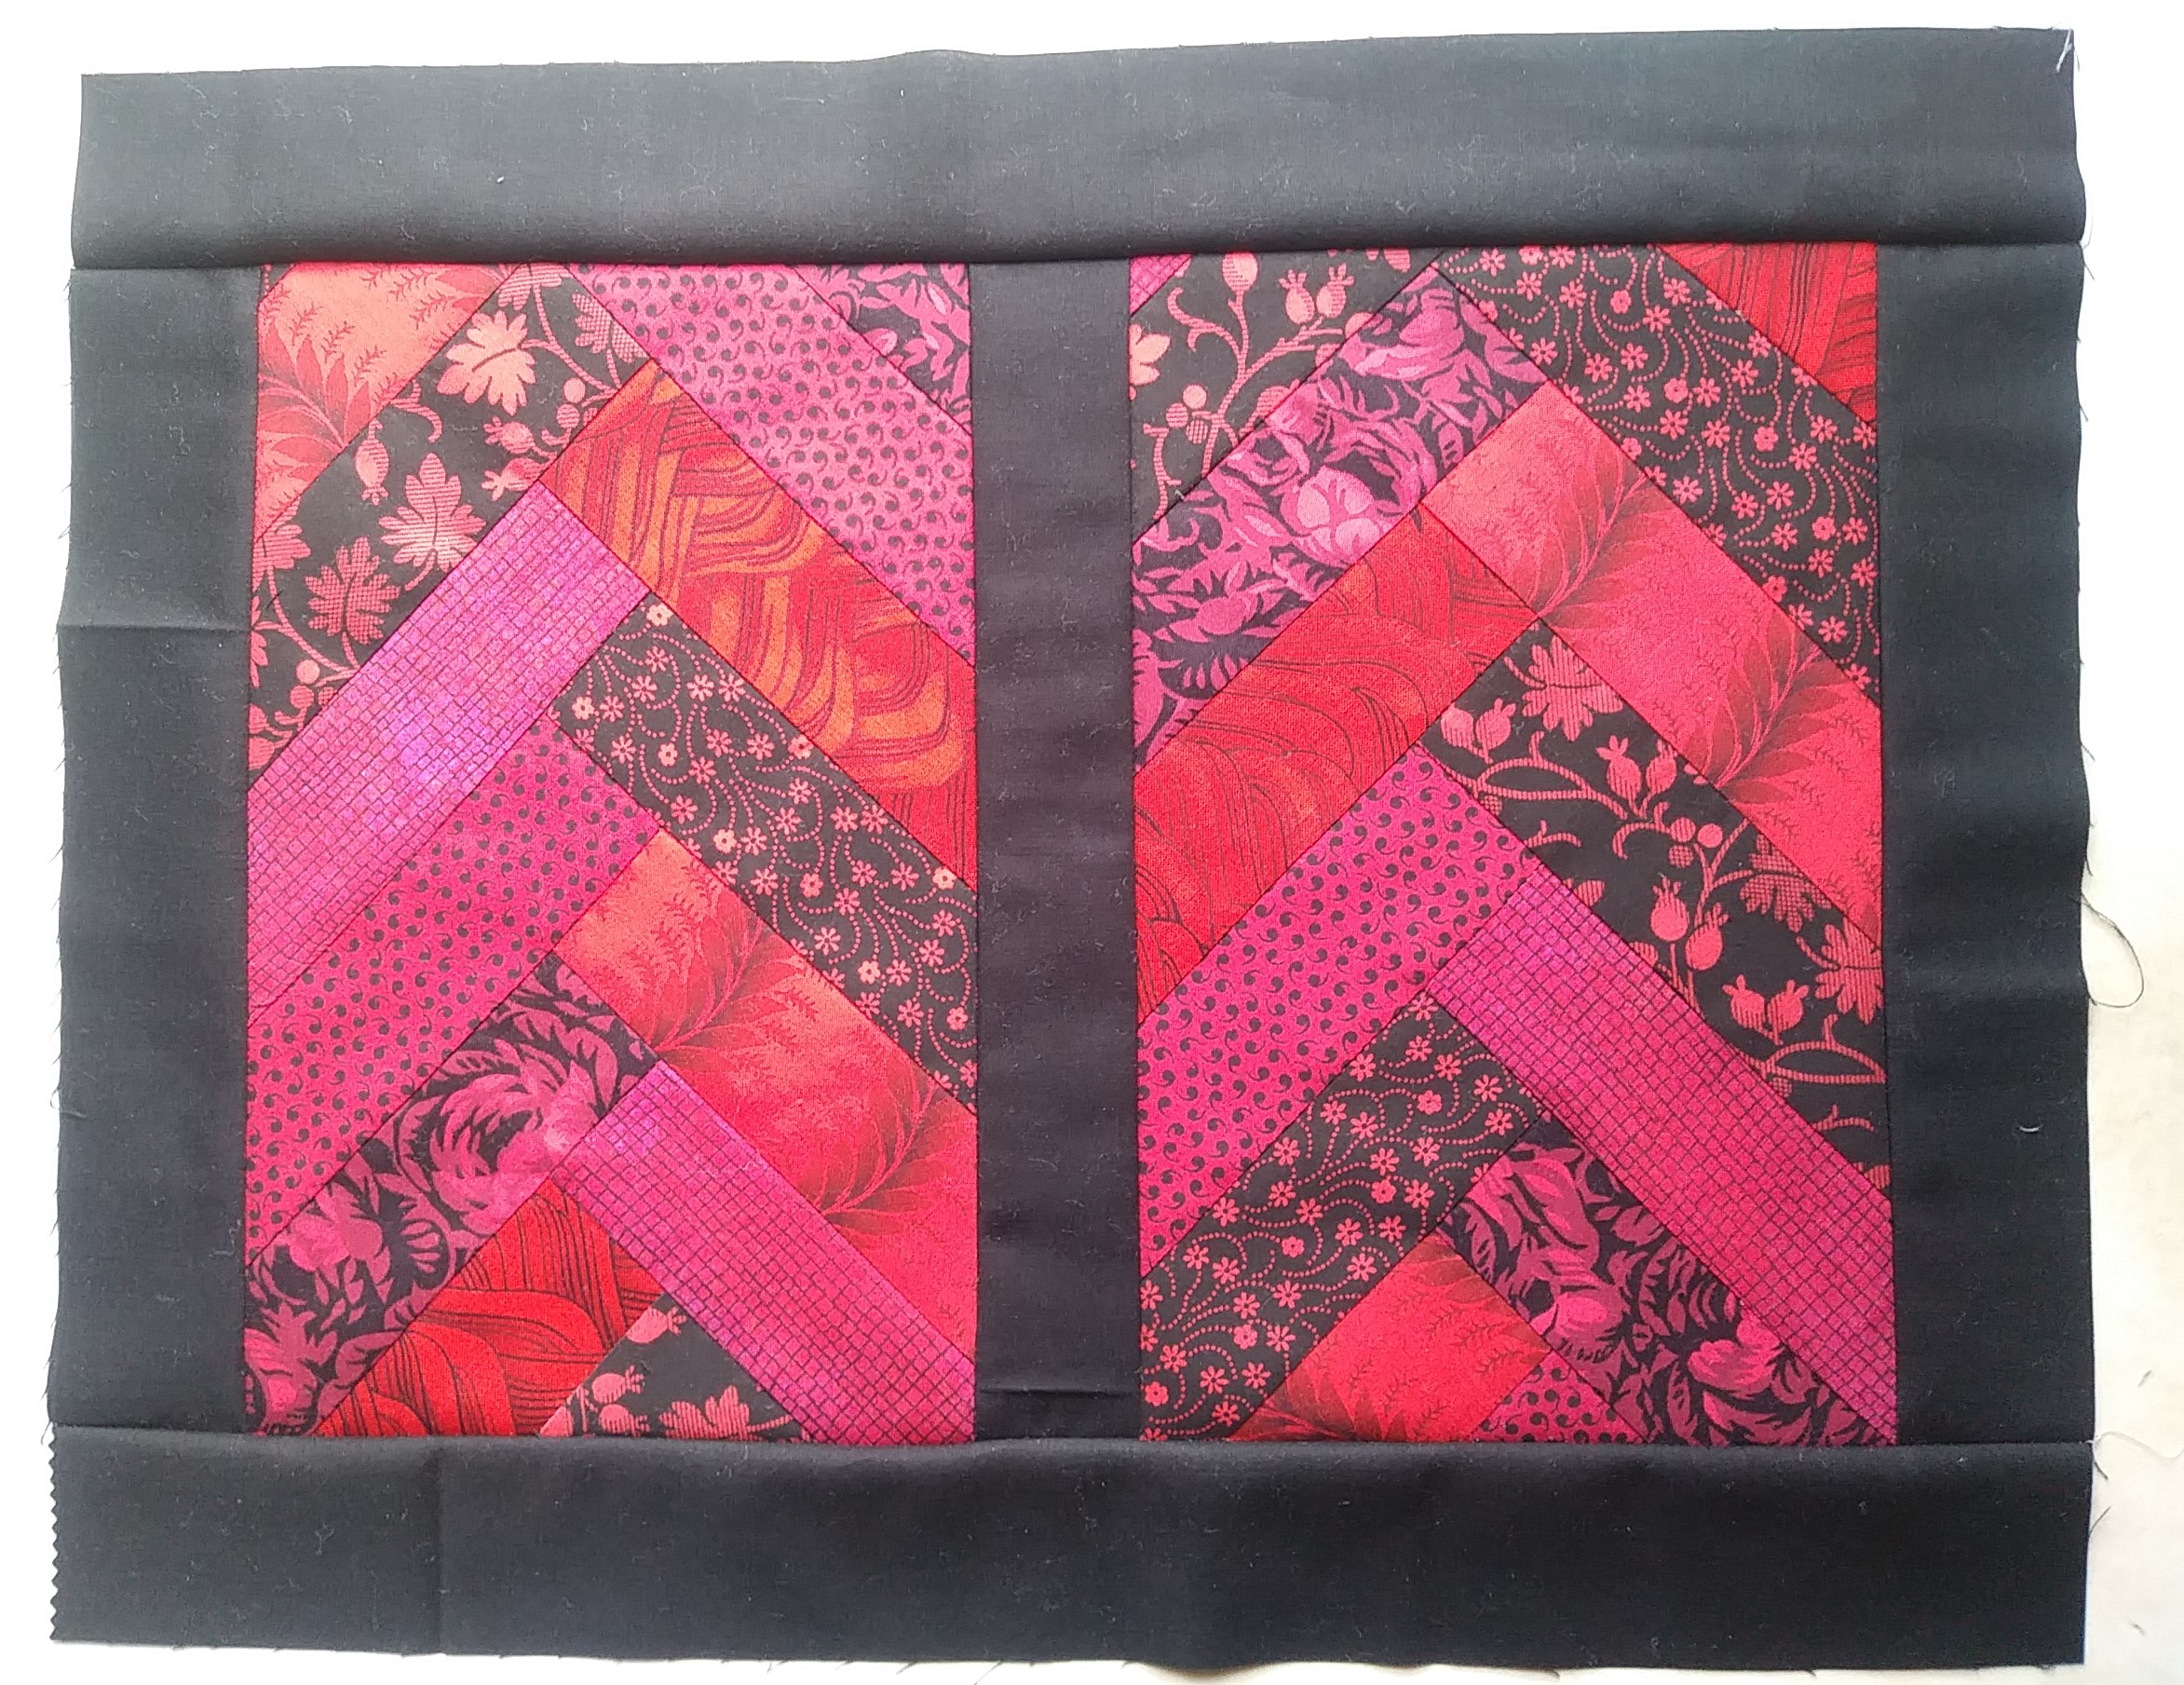
Now that I had an idea and the fabrics, I started out making the first accordion, pictured on the left.

When made with 5 inch blocks, this accordion makes a star block whose name escapes me at the moment, but which finishes at 16 inches.  I considered making four of them and doing a straight setting with sashing, but decided that was boring.

Instead, I decided to do a medallion style quilt with the star as the center.  I planned to surround the star with 4 inch strips, then add more HST around that which would make a 32" quilt.  I made 24 more HST from the nickels and put them around the star on the design wall.  It was OK, but kind of eh. It needed to be bigger.

Adding another 4 inch background border would have worked, except for the fact that the background fabric that I had left was about 2 strips too short.  Of course!

Back to the stash!  I found some nice pink 2 1/2 inch strips left from one project or another, and they turned out to be just enough to add a 2 inch accent border around the star medallion.  That made just enough of a difference to allow me to cut the 4 inch outer border strips from the remaining background fabric, with an inch to spare! That made me really happy, so I decided to name this project 'Tickled Pink'!  

Tickled Pink - 40 inches square


Wednesday, January 18, 2023

Fill-in Projects

While I was going through my stash looking for fabric for last week's Project Quilting challenge, I came across a few kits for small quilting projects and decided that they would be good fill-in projects for the weeks in between challenges.  

The one I decided to work on first was a snowman pillow that was part of the Button Pillow series by Karen Montgomery of The Quilt Company.  I finished the pillow top and added a zipper to the back instead of making the cross-over back that the instructions call for. I was feeling pretty proud of myself for remembering how to do it.  You know how they say that pride goeth before a fall?  Keep reading....

Instead of storing my seasonal pillows when they are not in use, I've been making pillow covers and reusing the same pillow forms.  The pillows take up a lot less storage space that way. Realizing that the pillow form that would fit the new pillow was already in use, I decided to just make a new one rather than buy one.  

I found the muslin that I had bought some time ago for a long forgotten project, cut out an appropriately sized chunk sewed it together.  The next step was to find something to stuff it with.  I have lots and lots (and lots...) of left-over batting scraps.  I remembered being told that flat batting doesn't make good pillow filling because it isn't fluffy enough.  So I reasoned that if I cut it into small chunks, there would be a lot of air in between the pieces, which would make it 'fluffy'!

Again feeling proud of myself for figuring that out, I got out an old cutting mat and an old rotary cutter with a 'dull' blade.  My cutting table was piled high with other things and I was too lazy to move the clutter.  So I laid the cutting mat on the floor and spread out some of the leftover batting strips.  I then proceeded to kneel on the floor beside the mat and started rolling the rotary cutter back and forth over the batting.  Once the first batch was in small chunks, I put it into the muslin pillow cover and spread out some more.  After repeating this several more time, I was feeling pretty happy with the results.  The pillow cover was getting nice and full and squishy, just like a pillow form should be.  For the next set of batting strips, I put my hand on the mat beside the batting to give me a little more stability.  Can you figure out what happened?  

OUCH!!! The next thing I knew, the middle finger on my left hand had a gash in it that was bleeding profusely!  I'll spare you the gory details (#5 stitches!). In the past, I've always used a ruler with my rotary cutters, and have never done any 'freeform' cutting.  From now on, I'll clean off the clutter and use the table so that I don't have to lean on my hand, or I'll buy one of those cut resistant gloves.

All in all, I was very lucky.  I didn't cut any ligaments or tendons, and the gash is on my left hand. And my husband doesn't mind doing dishes!


Saturday, January 7, 2023

Project Quilting 14.1 - The First One

I was heading to bed on Sunday night when I realized that it was the first Sunday in January, and Project Quilting was starting!  On Challenge weeks, I am normally chomping at the bit, refreshing my screen every few minutes while I wait for 1 p.m. Central time.  But this year, I just didn't put two and two together until about 11 p.m. (Eastern). I considered just waiting until morning to check, but my curiosity got the better of me.

As I was heading for the computer, I thought that maybe Trish and Beth would wait a week to post a challenge, since January 1 was a holiday.  But nope - there it was!

I have to admit that the theme this time really stumped me. ONE??  One what?  One block?  One item?  Once in a lifetime? None of the examples that were given were particular enlightening to me.  I slept fitfully while my brain stewed on it all night long.  Note to self - next time, don't wait until bedtime to check the theme of a challenge!!

Somewhere in the middle of the night, it occurred to me that there were other examples of 'the first one' that I could use.  The first item in a sequence, for example.  That really got me thinking (and NOT sleeping)!  For example. there are many different alphabets - Greek, Roman, Cyrillic, etc.  and each one has a different symbol for the first letter.  Maybe I could do something that took each 'A' and applique them on to ... something?  

I considered making 'one' single block and using the different "A"s on it, and turning it into yet another potholder or mug rug, but that idea really didn't appeal to me.  For the past few PQ seasons, I have made a LOT of potholders and mug rugs.  There is nothing wrong with that, and sometimes, that is the only thing that I have time to make.  But I'm craving something different this year.  I decided that I really want to make a series of baby quilts.  I'm putting that here, realizing that I may not be able to make a baby quilt for each challenge, but I'm going to try.

OK, back to "one".  As my brain churned while I was trying to sleep, another idea popped in.  Another 'first in a sequence' is the first element in the periodic table - Hydrogen.  The symbol for hydrogen is the letter H. There is a traditional quilt block that is an H, and it is very easy to make! And before you ask, yes, yes I am a nerd!  I freely admit it.  I have a Bachelor's degree in Biology, but my minor was Chemistry.  

So having decided what direction my project was going to take, I finally managed to get to sleep!  

The next day,  I opened my computer and found the copy of EQ7 that I occasionally use.  I had several commitments this past week, so I knew that the quilt would have to be quick and easy.  After playing around with H blocks, I came up with a setting that I liked, and that wouldn't take too long. 

I went digging in my stash and found a Fisher-Price Stacker (set of 10" squares) from  Riley-Blake Fabrics and decided that this would be the perfect way to use some of it.  I also discovered that I had some 2 1/2" strips left from a white Kona Cottons fabric roll that I had used in a previous project so I used them in the H blocks and for the sashing.  

Normally, I would use more of the 2 1/2  inch strips for the binding, but I really didn't want a white binding.  Some of the 10" squares were striped, so I cut them into four 2 1/2 inch rectangles each and stitched them together to make the binding.   A quick all-over meander on my Bernina B590, an evening sitting in front of the TV stitching on the binding and it's done!  With a whole day and a half to spare!


My 'H' baby quilt