Saturday, March 6, 2021

Project Quilting 12.5 - You're Crazy

Sometime in the middle of last year, I came across a blog that showed elaborately embroidered, four patch pin cushions.  They looked fascinating, so I bookmarked them for future reference.  If you're interested, the name of the blog is Hummingbird Highway, and here is a link to the article that shows some of the pincushions. Puffy Fours Pincushions

When I saw that the challenge this week was "Crazy", I immediately thought about those pincushions, because of the embroidery.  For me, the defining feature of crazy quilting is the embroidery.  I was thinking that I could piece the top like a crazy quilt and do some lovely hand embroidery on the seams.  I Googled 'embroidery stitches' and saw some really cool stitches that I wanted to try. 

I have done some hand embroidery, but it has been many years.  Mostly, it was very basic outline stitches, chain stitches and satin stitches.   But that didn't stop me from digging out the embroidery floss and perle cotton and planning to have a go at it.

Once I read the blog again, I realized that the pin cushions are a LOT smaller than I originally thought that they were.  They start with a four patch that finishes at 3 1/2 inches.  To tell you the truth, I wasn't in the mood to work with tiny pieces.  First of all, I would have to piece four 2 1/2  inch squares from even tinier pieces to make the 3 1/2 inch four patch. Then, the seams would be so short that it didn't seem like it would be worth embroidering on them. 

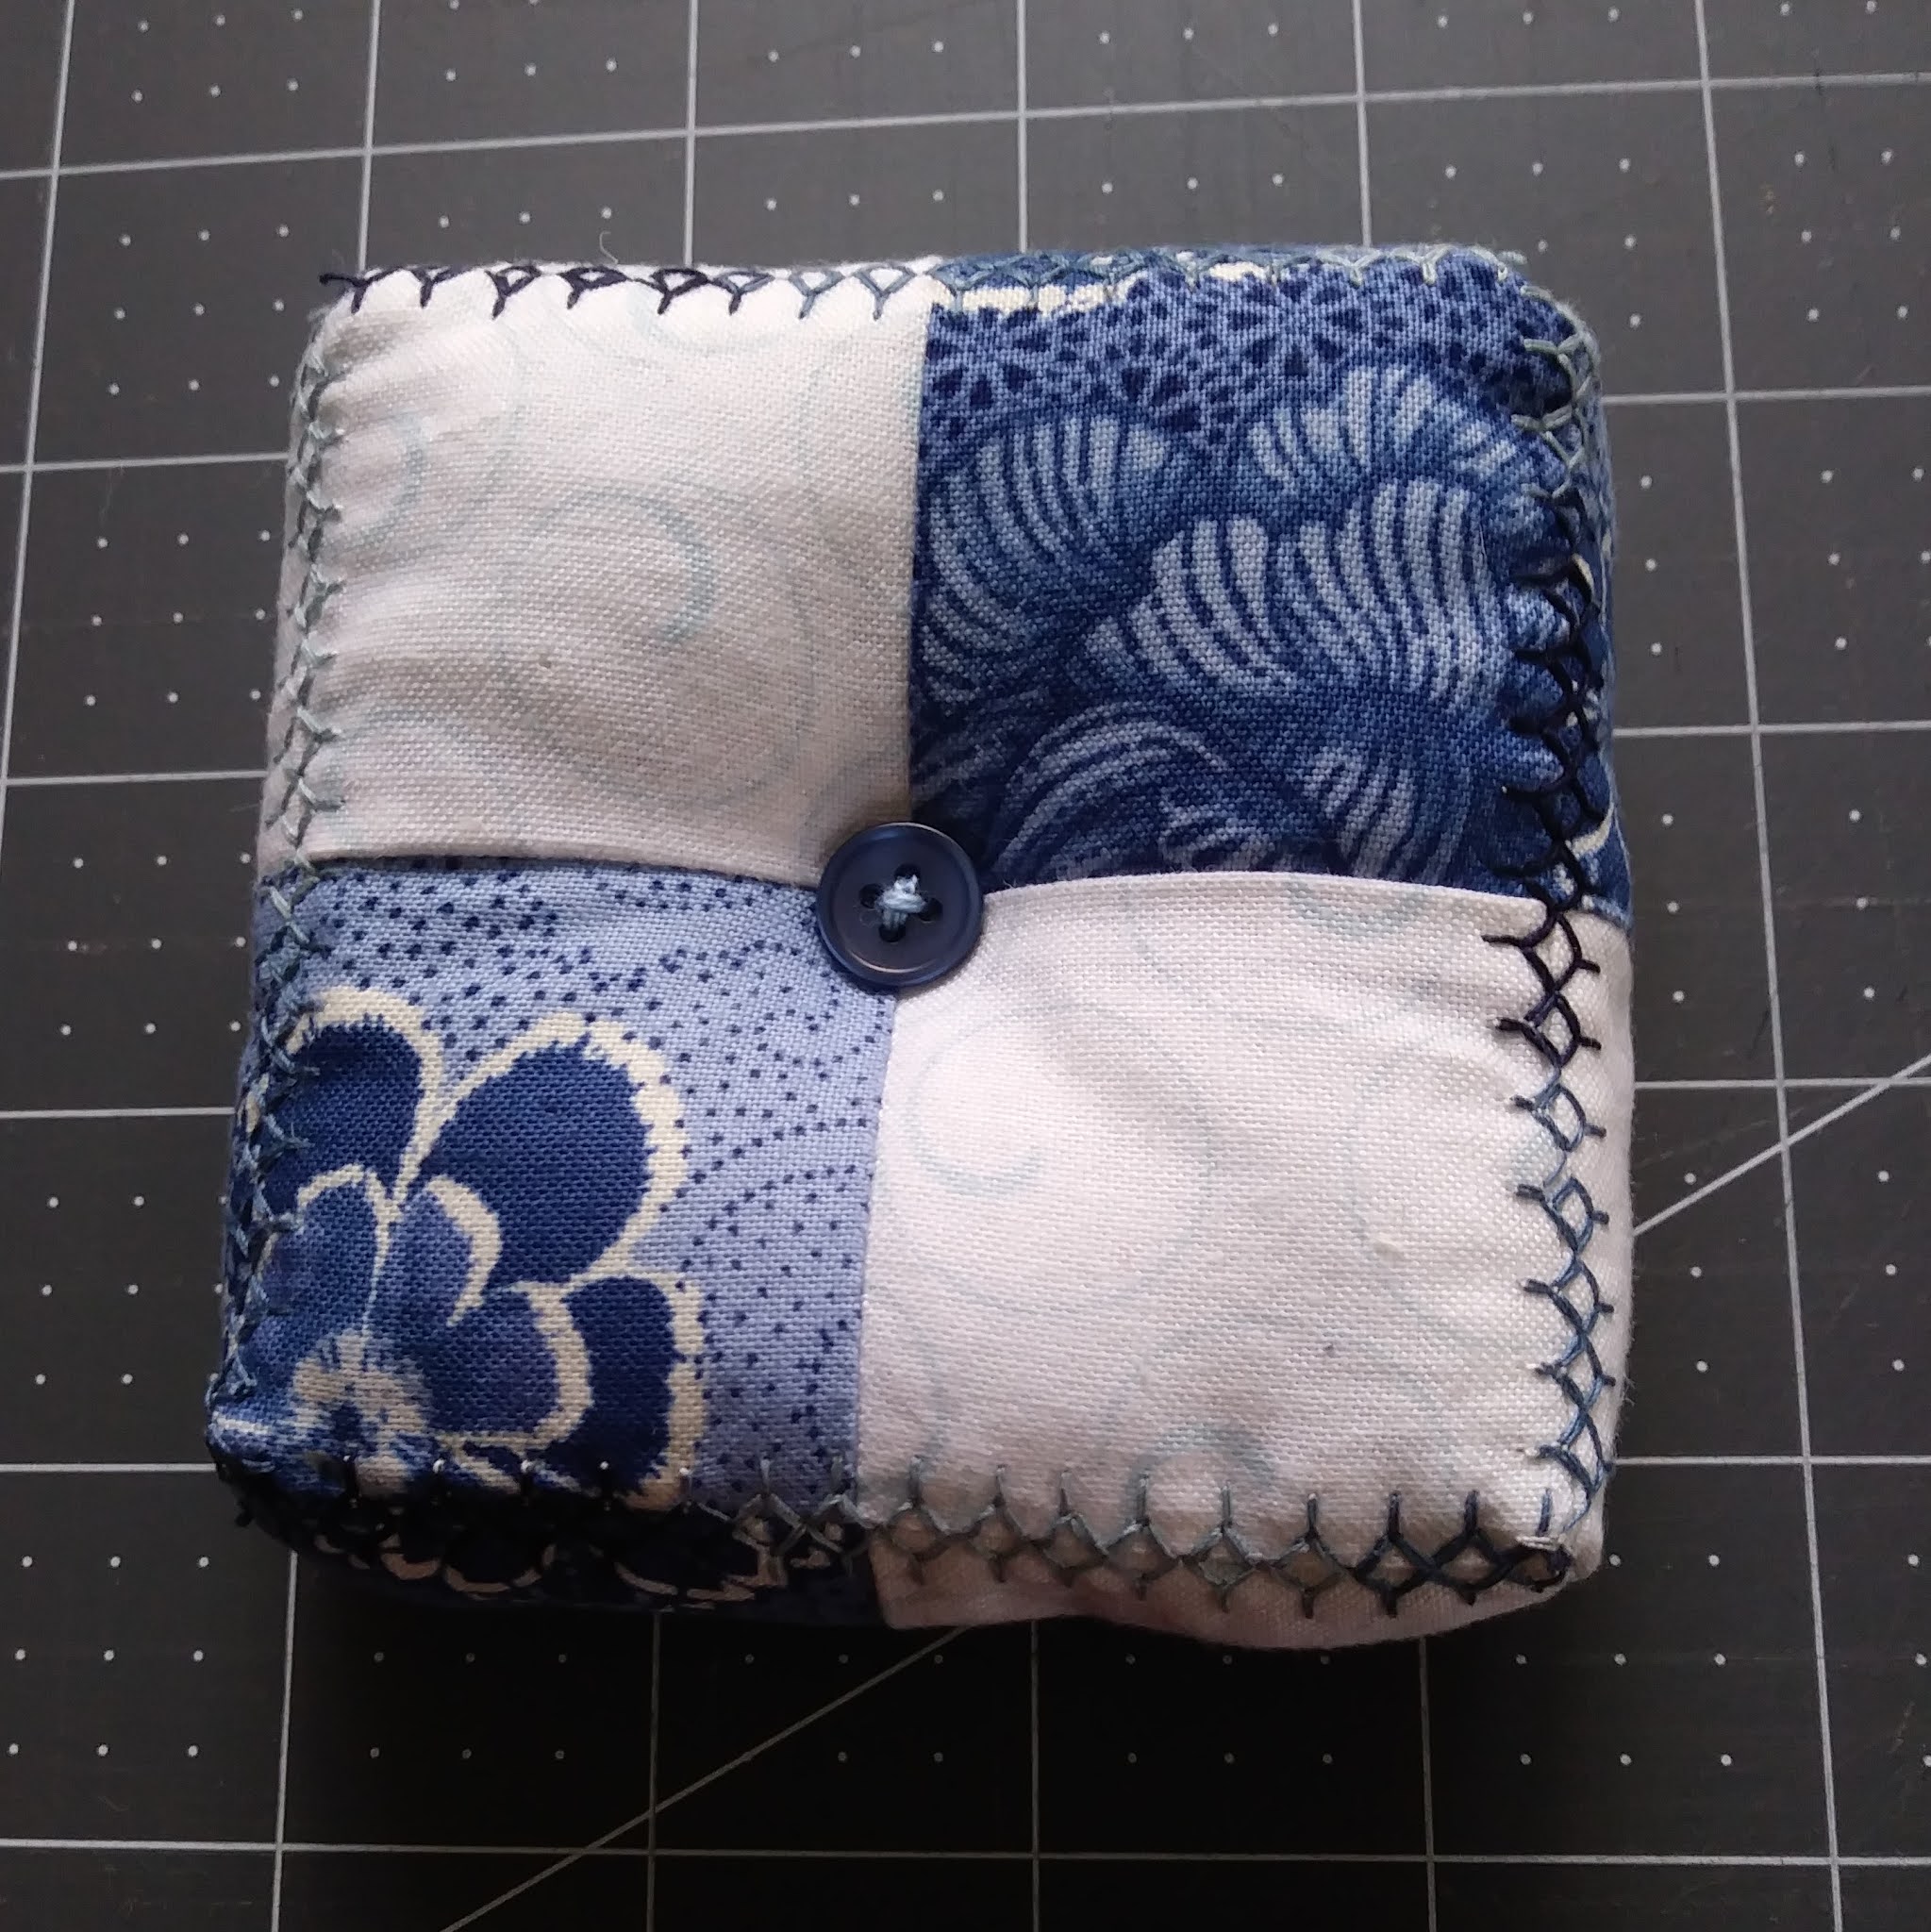
So I decided that I would make a pincushion, but start with regularly pieced four patches, much like the ones on Hummingbird Highway. I reasoned that one of the main features of crazy quilting is the embroidery, right?  And I would use all those lovely embroidery stitches along the sides and the middle seams....

After putting together the top and side piece and discovering that I didn't have a small enough embroidery hoop, doubts about the feasibility of this project started to surface.  I put it aside for a day or two while I thought about how to get a 4 inch project into a 6 inch hoop.  I grabbed some fabric strips from my stash and basted them to the sides.  Ah, ha!  That worked!  

I pulled up the site with the cool embroidery stitches, threaded my needle with a variegated blue perle cotton and got to work.  Well, 'got to work' is a bit of an overstatement.  It makes it sound like I actually accomplished something.  What actually happened is that I attempted the first stitch, a feathered chain stitch.  I mean, I've done chain stitches, so how hard could this one be?  Half an hour later, I had tried and ripped out the stitches numerous times.  My feathered chain stitch looked nothing like the diagram.  My brain just wasn't able to interpret all those arrows and numbers in the diagram. Maybe a different stitch would be better to start with?  

My next attempt was the open Cretan stitch, which according to the site, is a simple variation on the feather stitch.  Another half an hour passed, during which I attempted, ripped out, attempted again, ripped out again, etc. etc.  After throwing the embroidery hoop, perle cotton, needle and all across the room, I was seriously questioning my ability to finish this challenge.

Yesterday, I decided that all those fun looking stitches on my sewing machine were put there for a good reason!  I found one that I liked, and embroidered around the edges and finished the pincushion.  I really like it, but I decided that it really wasn't a good interpretation of the challenge.  Even with the embroidery, it is just too 'sane'! So I resolved to start over after a good night's sleep.


This morning, I grabbed my bin of small scraps and started sewing them together.  I ended up with an oddly shaped piece that was about 9 inches on the longest side. 

I've been trying to avoid making another potholder or mug rug for this challenge, since I've made so many of them for Project Quilting in the past.  But I knew that I would have to finish the challenge quickly, so a potholder would fit the bill. 

Using one of my other potholders as a template, I cut out a circle approximately 7 1/2 inches in diameter.  Two pieces of Warm and Natural scraps provided the insulation.  I used up a spool of variegated thread exploring all those fun stitches on my sewing machine.  I added a backing and a bias binding, and finally had a project for this challenge!


Thursday, February 18, 2021

Project Quilting 12.4 - Snail's Trail

A few years ago, in 2015, I was a member of group sponsored by Quiltmaker Magazine called the Scrap Addicts.  We were each assigned two or three of the blocks from Bonnie Hunter's Addicted to Scraps column, and we then made a quilt based on each block.  The quilts were then featured in their blog,"Quilty Pleasures".  In the course of working with them, I was asked to do a couple of extra things, one of which was to make a "Bitty Block".

Bitty Blocks were 3 to 4 inch versions of traditional blocks, and they were the subject of a regular post on the blog over the course of the year.  There were tiny houses, little pinwheels, small Christmas trees and all sort of other miniaturized blocks.  The one that I made was a snail's trail.  Snail's Trail is a fun traditional block, albeit one that isn't seen that often.  

So when I saw that the 4th Project Quilting Challenge was "Snail's Trail", I figured that I would just back to the blog post that featured my Bitty Snail's Trail and start there.   

Yeah, well...Like they say - "the best laid plans... often go awry". I had dutifully bookmarked the articles so that I could go back and find them.  But when I tried the links this week, they weren't there! What the heck? It turns out that there was a bit of a shakeup in the quilt publications field a few years after the articles with my work appeared.  The Quilty Pleasures Blog is now part of Quilting Daily, and the archives only go back to about 2017. 

After I finished having my fit of self recriminations for not copying the articles and saving them to my hard drive, I decided to just go ahead and start from scratch.  

I remembered seeing a quilt pattern in Quiltmaker Magazine that seemed to be inspired by a poster of the Broadway musical Wicked and the Snail's Trail block, and thought about making it for this challenge.  

Poster from 'Wicked'
Any Witch Way pattern from Quiltmaker Magazine

I've wanted to make this pattern since I first saw it, but I really have no place to hang it, and it is too big for a pillow top and too small for a couch throw.  So it goes back into the 'some day I'll make this' pile.  

The idea of intertwining hats started me thinking about other hats that could intertwine.  I've been noticing gnomes everywhere lately.  Hmmm... gnomes have hats, right? And THAT lead me to think about the gnome applique that my friend Karen Montgomery posted to her NINE PATCH A DAY Facebook group. 

As an aside, the group was started with the intent to help mask-makers turn into quilters.  She posts a video about once a week and explains how to do the various steps in making a quilt.  She is a very accomplished teacher and does a fantastic job explaining and showing how to do things.  The group was intended for beginners, but it is a great refresher for those who need or want it.  

The group was started with instructions on how to make the eponymous block, but everyone wanted more, so it has since morphed into other things.  After the Nine-patch, the churn dash block was  featured, and she has now moved on to teaching about machine applique.  

She designed and posted a simple applique of a gnome a week or so ago, and that was the inspiration for the gnome in my Snail's Trail challenge. My brain mish-mashed the snail's trail and gnome's hats and I came up with a pillow cover that I call Tessellating Gnomes.  The border was added because Karen said that gnomes look better when they are sitting on something instead of floating in the air, LOL! 


Tessellating Gnomes

 
By the way, someone told me about a 
website called the Internet Archive Wayback Machine.  It is run by a nonprofit organization that is dedicated to creating a digital archive of the internet.  I figured that it was worth a try to see if I could recover the articles.  After fiddling around with it for awhile, I did manage to recover the articles!  I copied them to a Word Document and saved them to my computer.  Now I just have to remember to back up my computer periodically so that I don't lose them again!


Wednesday, February 3, 2021

Project Quilting 12.3 - Virtual Vacation

 Vacation!  That sounds so wonderful right about now.  It's cold and it's snowy, and the weather forecast for the weekend has the temps diving into the single digits.  I can't wait for the weather to warm up!  

But unfortunately, Punxsutawney Phil just forecast another 6 weeks of winter.  Don't know who that is? Click here for the Wikipedia article about him, and click here for the Punxsutawney Groundhog club's homepage where you can watch the video and read the annual proclamation.  If you grew up in Pittsburgh, like I did, it is a given that you know all about Phil, and maybe you even have driven to Punxsutawney to participate in the early morning festivities.  Said festivities start before dawn. Being a night owl, I have never even been tempted to join in the fun!

I would guess that most people outside of Western Pennsylvania didn't know anything about Punxsutawney Phil until the movie "Groundhog Day" was released. The movie is set in Punxsutawney, Pennsylvania, a small town about an hour and a half northeast of Pittsburgh.  It's all about a disgruntled Pittsburgh weatherman who is assigned to cover the Groundhog Day events, along with his producer and a cameraman.  When they get snowed in, he wakes up the following day only to find out that it is still February 2.  And he keeps waking up to February 2 over and over and over again, until he finally gets everything right, whereupon time continues and he can leave Groundhog Day behind. 

In the real world, we don't have to put up with the same cold snowy day over and over again, but now that Phil has called for another 6 weeks of winter, I am even more anxious to get away from the cold!  

I was trying to figure out how to depict a "virtual vacation" in a quilt when my daughter showed me some pictures that she had taken of her "Panda Slipper Vacations".  One day last spring, while we were in COVID lockdown, she was surfing the internet and came across an article that mentioned that many places have links to virtual tours, train rides, and all sorts of other ways to see the world without leaving home. She has always loved to travel so she decided to do it virtually since she couldn't do it in real life.  The first "tour" that she chose was the National Zoo in Washington, DC. where she found the panda-cam. While she was watching the pandas, she realized that she was wearing her panda slippers and thought that it would be fun to have a picture of her feet in the panda slippers in front of the computer screen showing the pandas.  She has a souvenir cup from the National Zoo that has the pandas on it, so she ran to the kitchen to get it and she put that in the picture, too.  That one picture launched a series she calls her Panda Slipper Vacations.  Each picture shows her feet in the slippers and an interesting destination on the screen with something related to what was on the screen in the picture.  For example, the Disney World photo has a stuffed Mickey and Minnie beside her panda slippers.  What a creative daughter I have!

A castle in the UK, along with a cup of tea - English Breakfast, of course!


A fjord in Norway, along with a troll


Disney Land, with Mickey and Minnie

The one that started it all.


You're probably wondering what the heck all that has to do with this week's challenge.  Well, when I saw her feet in the slippers, I was thinking about what I usually wear on my feet when I'm on vacation, and the answer is flip-flops!

I knew that I had seen a pattern for a flip-flops quilt but knew that I wouldn't have time to make even a small quilt this week.  So I started thinking of other options.  

Over the last few years, I have been making table runners and covers for my living room throw pillows for each season or holiday.  I had just put out the Valentine's Day table runner and my heart pillow covers (including one that I made for PQ 11.3 last year!) and I realized that I don't have anything for summer. 

I dug in my patterns and in my stash and found a seashell print and an appliqued embroidery design for a pair of flip flops.  Since summer to me means vacation, I decided to make a nice new summer vacation pillow cover.  Voila!  Vacation!


Thursday, January 21, 2021

Project Quilting 12.2 - Fussy Cut

Starting a new Project Quilting challenge always causes a quandary for me, as I'm sure it does for a lot of people.  What do I make?  What do I WANT to make? Should I make a big project? Or something little?  How much time do I have to devote to the project this week? All these thoughts run through my head and I mull them over for a few days while I try to figure it out.  

It seems that I've been making a lot of mug rugs and potholders.  These are not bad ideas; they are actually great ways to try a new technique or color combination.  They are also good if you really aren't sure that you are going to like the result!  I don't mind using something I don't particularly like as a potholder.  I can always use new ones, since potholders get a lot of abuse in my house.  Mug rugs also get a lot of use, since my family tends to carry mugs, glasses and cups all over the house. So I like having extra mug rugs sitting around to protect the furniture.

That said, I am a bit tired of making mug rugs and potholders.  But I also don't want to start another big quilt project.  I have so many UFOs that I feel guilty starting something else.    

While I was debating what to make, I ran across a Facebook post by Karen Montgomery in her Nine Patch a Day group.  She showed a cute little heart that she made as a gift card holder for one of her grandkids.  She sewed 1 1/2 inch squares together into a 16 patch block, quilted it, then cut a heart out of it.  All the details are here: https://karensquiltroom.blogspot.com/?fbclid=IwAR1OwdLE6qi5dzVs9JHk97sDCN4mF0AhB42d6dtJa8oGpQGKGFhapRhyTwU

I had my project!  I dug through my scraps looking for something that I could fussy cut.  Since the squares are only 1 inch finished, a lot of the novelty fabrics that I have weren't suitable.  I found some leftover pieces of a Valentine themed jelly roll that had some cute little dark pink roses on it.  And I found some coordinating pink charm squares, to use for the alternate squares, the backing and the pocket on the back. 

I've never done any fussy cutting, so it took me some time to figure it out. After some mental gymnastics, I realized that all I had to do was center the roses in a one inch square on my ruler and add a quarter inch for the seam all around it.  Like I said, it was a lot of easier than I was making it!

For me, the hard part was arranging the squares so that the roses were centered. And again, I ended up making it harder than it should have been. I wanted a checkerboard effect, and I only had 3 identical rose squares.  I wanted them to be arranged so that there were two in the wide part of the heart and one at the pointy part of the heart.  The directions called for making a 16 patch, which would cause the roses to be offset.  After several (many!) tries, I ended up sewing a rectangle that was 5 x 4 blocks which worked out nicely.  

It didn't need much quilting, so I quilted it along the vertical seams only, using a decorative star stitch. 

Digging through my ribbon bin yielded a pretty pink grosgrain ribbon, which coordinated perfectly!  I used it for the bow and also a loop to hang it with. I'm not sure what I'm going to do with it, but I like it!


Friday, January 8, 2021

It's That Time Again!


It's Project Quilting Time!  I love the fact that Project Quilting happens right after the holidays have died down and the bleak dreary days of winter start staring me in the face.  It really gives me something to focus on besides the fact that the sun probably won't make an appearance for another 6 or 8 weeks.  No, I don't live above the Arctic Circle, it's just that winters here in Western Pennsylvania tend to be gray and cloudy with only a few rare sunny days.  And when we do get a sunny day, the temperatures usually do a nosedive.  So, no, I am not a fan of Western PA winters!  The spring and fall however,  are glorious!  Summer?  That's a whole 'nother post, for later!

So back to PQ!  When I first read the title of the first PQ 12 challenge, I was curious, but not thrilled.  It's called Illuminating + Ultimate Gray, which are the Pantone colors of the year for 2021. The challenge is to make a quilted project using those two colors.  Gray and yellow.  In my mind, neither of those colors are bad by themselves, but together?  Yuck.  So this challenge was definitely NOT going to result in a bed size quilt!

I waited a few days to see what other people were posting, and yeah, I can see that, depending on how they are used, the combination is not so bad.  I'm not going to make something huge, because I’m not that big of a fan. 

I’m trying to use up what I have and not make any unnecessary purchases, so I went spelunking in my scrap bin to see what I could come up with.   Yellows and grays are woefully underrepresented in my stash, but I did find some yellow 1 ½ inch strips and a few chunks that were gray or mainly gray. 

That has been somewhat of a theme for me during this pandemic - Stay Positive and make the most out what I have.  With that in mind, I have made two projects that use the ‘+’ sign so far and decided that this would be number 3.

The first project was a challenge from the Creative Quilter’s subgroup in my local quilt guild. The idea was to make a small wall hanging using the theme “Yellow Line”.  The challenge was to use black, white and yellow and to have the yellow form a line of some sort across the quilt.  We all used the same yellow fabric, and when we have our quilt show next year (fingers crossed…) we will hang them so that the yellow line from one quilt connects to the yellow line in the next quilt.   I made a crazy quilt with the darkest prints toward the bottom, and shaded it to the lightest on top, then appliqued yellow plus signs diagonally across it.  I titled it “2020 – Staying Positive Amid the Chaos”.  I plan to embroider word like pandemic, murder hornets, Midwest derecho, wildfires, contentious presidential election, rioting, record breaking hurricane season, etc. across it, to represent the chaotic year that it was.  

I’m not done embroidering yet because I wanted to wait to the end of the year to see what else could possibly happen!  I think that I have enough words to embroider to keep me busy for quite a while!

The second was a mug rug for my swap partner in the Teal Mini Swap.  I made small 9 patch blocks with bright colors and a white background.  The brights were in the middle squares of each block, so that it looked like a bunch of little plus signs. I unfortunately forgot to take a picture, and I don't want to steal anyone else's photos, but if you search for "Plus Sign Quilt", you will find something similar, I'm sure.

Here is my project for PQ 12.1

I’ve always been interested in making an interlocking plus sign quilt so I decided to use that idea on a small scale. It is about 8 1/2 inches square, so it's either a potholder or an oversized mug rug, depending on how I use it!

Saturday, May 2, 2020


Quarantine Projects   

For some reason, during these last 6 weeks of quarantine, I haven’t felt like working on big projects.  It would be the perfect time to finish up a bunch of UFOs, but what do I do?  Start a bunch of new things.  Little things that I can finish quickly.  For example, the picture below shows the projects that I made last weekend. 

What was I thinking, making a St. Patrick’s Day pillow at the end of April? Well, I had the fabric for the front, border and back all cut out since the week before St. Patrick’s Day, but just couldn’t decide what to put on the front.  Then, last week,  I saw the Irish Blessing embroidery file on sale, and that decided it!  I knew that if I let the project sit until next year, I would lose it somewhere, so I just went ahead and made it.  Next time, I’ll use a different stabilizer, because the embroidery pulled a little too much and left some wrinkles which I can’t iron out. 

The cute little owl stuffie has a pocket in the front, so I think that I will sit it on the end table and use it to hold my embroidery scissors or maybe a few crochet hooks.

The trivet is made out of fabric twine, which I started making a couple of years ago. It is a great way to use up those thin strips of fabric that you hate to throw away, but are too small to use for much of anything.  I wasn’t really sure what I was going to do with it, but it is a good project to make when you are sitting in front of the TV and don’t want to have to concentrate on what you are working on, but can’t stand to just sit in front of the TV. One day last week, I saw a video on Debby Brown’s website (https://www.debbybrownquilts.com/) where she made coasters and trivets out of fabric twine.  Until I saw that video, I didn’t think that a needle would go through the twine because it is so tightly twisted.  Her twine is twisted a little more loosely than mine, but I figured that I would try it to see what would happen.  I’m happy to report that I only broke one needle.  ^.^  This trivet is about 8 inches across, and it only used one smallish ball of the twine that I have made so far. And I have tons of narrow strips to make more twine.  There might be a rug in my future….


Anyway, this week’s Project Quilting Quarantine theme is Vintage. I looked up the definition of Vintage.  There doesn’t seem to be a consensus, but one definition is something that is at least 20 years old. 

In the early 2000’s, I was part of an online swap group for what at the time were called ‘nickel squares’.  The intent of the group was to get a variety of fabrics to make the quilts in the book “Nickel Quilts” by Pat Speth and Charlene Thode.  This was well before charm packs were introduced.  I think that the swap was run in Yahoo Groups. A theme was announced, and then you would go into the site and sign up for the swap if you were interested.  From what I recall, you would need to cut 5 (or 6?) different fabrics into 5-inch squares, pair up the squares, keep a pair cut from each fabric for yourself and send the rest to the quilter who was in charge of the swap.  She would then switch them all around and send you back the same number of nickel squares that you sent in, but they would all be fabrics from other quilters.  It was rather convoluted, but it was a good way to get the variety of squares needed to make the quilts in the Nickel Quilts book. 

I swapped and I swapped, but somehow, I never made any of the quilts. But I have found other uses for the nickel squares, so all the work was worth it in the end.

Anyway, I still have a whole bin full of those nickels. I’m not sure that they are quite 20 years old, but since the PQQ rules can be loosely followed, I am calling them Vintage!  Here is the table runner that I made using some of my vintage nickel squares.  It was made from a brilliant pattern designed by Gudrun Erla called L’il Kim.  The brilliant part is that it uses a charm pack with no extra fabric to make a table runner!  I used 20 dark and 20 cream nickel squares instead of a charm pack, and I really like the way that it turned out. 

Saturday, April 18, 2020


Project Quilting Quarantine -2 

My goal for this year was to finish a lot of UFOs.  Note the past tense.  The coronavirus hit, and what does everyone do?  Post tempting quilt-a-long projects to do while we are all stuck at home. AAAARRRRGGGGHHH!   Since the middle of March, when everything shut down, I have started 3 new quilts and a table runner.   How many UFOs have I finished?  None.  Zip, zilch, nada.  I did finish my PQ 11.6 Vibrant and Vivacious challenge, but since that wasn’t a UFO, I’m not counting it.  Oh well, there’s always the rest of the year!  

One of the new quilts that I started was from a quilt pattern called “Elvira” for Gudrun Erla’s Quarantine Quilt-A-Long.  I finished the top, and I was thinking about finishing and submitting it for the first Project Quilting Quarantine Challenge, which was “Big”.  I reasoned that it qualified on many fronts – 1.  I used a large-scale print for one of the fabrics.  2.  Even though I made the ‘crib’ size, it is the biggest crib size ever! At 49 X 65, I would consider it more of a lap quilt, or a couch quilt than a crib quilt. 3.  And last, but not least, this whole pandemic is by definition, BIG! 

I ultimately decided against submitting it, for a few reasons.  First of all, I started it before the challenge was issued, so it really doesn’t meet the rules.  I know that the rules are really flexible for PQQ, because after all, there is nothing at stake here.  The PQ quilt police aren’t going to come after me!  As Kim stated when PQQ was announced, it is only for fun, inspiration and community building.  Another reason is because I started making fabric masks for family and friends, and that took quite a bit of time.    It all boiled down to the fact that I just didn’t need the extra stress that would have been incurred by trying to get the top pinned, quilted and bound by the deadline while trying the masks done.  I decided that the masks are more important right now than a finished quilt is, no matter how good it feels to finish one.    

Speaking of masks… I wanted a mask for myself that would be bright and cheerful and spring-y.  

I remembered that I had a piece of a bright floral print by Karen Montgomery in my stash.  I dug it out and made myself a new mask.  It qualifies under the “ 3 layers stitched together” criteria because it has interfacing stitched in between two layers of fabric as a filter.  So here is my PQQ Floral Challenge Project.  Quick, easy, no-stress and very useful!  ^.^