Tuesday, March 19, 2019


Project Quilting 10.6 – Craving Chocolate

Yum! Chocolate!  Who doesn’t crave chocolate at one time or another? (or, ahem – ALL.THE.TIME!) But chocolate for a quilt project?  That takes some imagination!  The rules did say that it could be chocolate the candy or chocolate the color, as long as it is inspired by chocolate.

I was super busy during the week of the last challenge, but at least I was home.  This week, I will be leaving for a quilt retreat with my guild on Wednesday, and I won’t be home until after the deadline on Sunday.  I will have plenty of time to quilt, but the camp doesn’t have internet access, and I won’t have a computer with me anyway.  The project has to be done, blogged about and linked before 1:30 p.m. on Wednesday, when my ride shows up. 

I remembered that I had a small piece of fabric that showed boxed chocolates, so I thought that I would be a great place to start.  I knew that it wasn’t a big piece, but this week’s project was going to have to be small anyway due to my time constraints.  So the search began…

You’ve all been there, I’m sure.  You know you have it, you know where you saw it last, but you just can’t find it!  The first hurdle was the fact that my sewing room moved from my son’s bedroom to our family room and nothing is where I remember it to be.  The second hurdle was the fact that I vaguely remembered that I might have used it.  I wasn’t sure, but since it was such a small piece, I thought that I might have thrown it in with my scraps and put it into a block.  Since I couldn’t find it in the scrap bin with the other similarly sized pieces, I started looking at my WIPs.  (Works in Progress).  Just f.y.i. – by my definition, they don’t become UFOs (Unfinished Objects) until I lose interest and set them aside.  

Sure enough, I found it, already incorporated into a block.  ARRRGGHH!!  That’s the danger of using fabric.  You never know if you are going to need it for something else.  But that's the chance you take.  It you never use any of your fabric, someday someone will pitch it, which would be true waste.  So use it to create something beautiful!  Or something useful. Or both.  Just use it.  Lecture over, back to the topic at hand.


There it is, in the lower left corner of a scrap block.

Here is a closer view, so you can see just how perfect it would have been for this challenge:

See those lovely boxed chocolates?


Well, I wasn’t about to tear the block apart so that I could use it in my Craving Chocolate challenge, so I went back to the drawing board.  

I decided that my inspiration was going to be neither chocolate the candy nor chocolate the color.   I actually chose something slightly different – chocolate the beverage! 

If you look into the history of chocolate, you’ll discover that the original use of chocolate was as a beverage.  The ancient Aztecs used the cocoa beans to make a bitter drink that was used for ceremonial occasions. 

The hot chocolate or hot cocoa that we drink today is not very similar to what those ancient people drank, but it is one of my favorite beverages on a cold day. The commercially available packets that come 10 to a box are fine in a pinch, but I like the real thing! Start with unsweetened cocoa powder and some sugar and just a smidgen of salt.  Then you heat milk to almost boiling and stir it into the dry ingredients with a little bit of vanilla extract.  Topping it with whipped cream is optional, but highly recommended! 

My project this week is a mug rug for my favorite hot chocolate mug.
Notice the whipped cream dripping down the sides.  That was unintentional, but that’s what always happens to my whipped cream, so I left it that way. ^.^


Friday, March 8, 2019


Project Quilting 10.5 – Abecedarian

Unlike the last few challenges, this week I knew almost immediately what I wanted to do for the Project Quilting challenge.  For about 15 minutes, I wasn’t too thrilled about the topic because all I could think of was appliqued letters on something.  Sure, some kind of cute saying would be nice to hang in my sewing room, but I just didn’t have any enthusiasm about that. 

Then it hit me!  I have been saving novelty fabrics in order to make an I-Spy quilt for my grandson.  I figured that I could make the quilt with a block for each letter of the alphabet.  There wouldn’t be any actual letters on the quilt, but since each block would represent a letter, it would be suitable for the challenge.

I could have completed an I-Spy quilt quite a while ago, but I was unhappy with the letter J.   Honestly, there are not too many fabrics out there that show something that starts with J.  I thought that I might be able to find jelly beans, jets or jacks, but after looking for over a year, I gave up.  The only ‘J’ fabric that I found featured jalapeno peppers.  I wasn’t sure that a four-year-old who is just learning to read would get the connection or if it would confuse him   So, the fabrics have been sitting there patiently waiting for me to find a better J fabric. But when this challenge was posted, I decided that the jalapeno pepper fabric would be a learning experience for him!

I browsed around the web and Pinterest looking for ideas.  I found a pattern that had been published in Quiltmaker Magazine several years ago which looked promising.   It called for 49 charm squares bordered with solids and set 7 x 7.   I immediately decided that I could use two of each of my alphabet fabrics and make it not only an I-Spy quilt, but a ‘find the match’ quilt.  Since 2 of each alphabet fabric makes 52 blocks, I added four blank squares. Setting them 7 x 8 made a nice 42" x 48" quilt.  Voila, pattern decided on and all the fabrics were already in my stash and it was only Monday!

I wasn’t sure that I could finish a quilt in a  week, especially this week, but decided to  give it a try.  Some weeks, there is  nothing extra going on, but this week is one of those that are extra challenging, time-wise.  I belong to a concert chorale and this coming weekend is concert weekend.  We have a concert Saturday night and one on Sunday afternoon. We also have 2 extra rehearsals during the week in addition to the regular Tuesday evening rehearsal.  Lent starts this week, and with it the Fish Fry fundraisers that our church holds on Ash Wednesday and every Friday in Lent.  I’ve been volunteering there for the last few years, so I didn’t want to tell them no.  My rowing club’s quarterly member meeting falls this week.  The quilt guild has small groups that meet on the second Saturday of the month – yep, this week! Oh, and we lose an hour on Sunday morning due to daylight savings time starting. 
   
My Abecedarian-I-Spy-Find-The-Match Quilt 42"X48"

But in spite of all the other commitments,  I actually finished it early! I worked on it every spare minute and am posting this on Friday afternoon. Which means that I have time to go over the concert music and work on those rough spots before tonight’s dress rehearsal.  Win, win!


Friday, February 22, 2019


Project Quilting 10.4 – Pixel Play

One thing I really like about Project Quilting is that it really gets my creative juices flowing. That's great, but in a way, it is also a bad thing.  When the project theme is first announced, I get all these ideas running through my head.  And they don’t stop when it is time to go to bed.  So, my mind races all night long, and I don’t get very restful sleep!  The first few ideas are always very big and grandiose.  Then the timeline smacks me on the nose and I have to get realistic. Could I do a whole quilt in a week? Maybe, but not very likely.

This week, the theme is Pixel Play.  I immediately thought that I would simply take one of the photos that I had taken and blow it up until I could see the individual pixels, then use a portion of it to make this week’s challenge. 

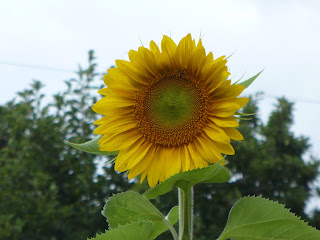
That was really naive.  I had absolutely no idea how many pixels are actually in a photograph! I used Microsoft Paint to pixelate this photo that I had taken of a sunflower in my back yard.  After I saw how many pixels were in an inch, I realized that my original idea to use 1 inch squares was out of the question. If I had used even a ¼ inch square for each pixel, this project would have COVERED my back yard and spilled over to the neighbor’s!  My sunflower idea wasn’t feasible for this challenge, but I just might put some form of it on my bucket list.

On to plan B.  I reread the guidelines for this week, and the phrase ‘8-bit graphics’ jumped out at me.  I remembered that I had seen a website that had a bunch of quilt block patterns inspired by video games.  The site is called “Fandom in Stitches” and it has patterns for all sorts of images from pop culture. The subtitle is “Multi-fandom quilt patterns, designed by fans, for fans".  I can’t begin to describe the scope of the available patterns!  If you are at all interested in making a quilt based on any popular show, movie or book (think Harry Potter, Dr. Who, Star Trek, Game of Thrones, Disney, etc.) go take a look.  Even if you just want to admire the artistry involved, definitely check it out. http://www.fandominstitches.com/  The patterns are for personal use only. Before making or saving any of the patterns, please read the FAQs, which specify what may and may not be done with the patterns. 

Not all of the available patterns would be suitable for this challenge, but I knew that I had seen blocks for 8-bit games like Minecraft, Super Mario Brothers and Space Invaders.  My grandson is currently nuts about Super Mario Brothers, so I chose a pattern from that game.  I decided to keep with my original ‘flower’ idea and chose the Fire Flower pattern by Angela Pingel.

The next hurdle was size.  Many of the comments that have been posted about this challenge concern the question of size.  As I discovered with my sunflower picture, even if you use a 1 inch square for each pixel, the end product gets very large, quickly.

The pattern I chose was designed for 1-inch finished squares, and the grid is 18x18.  If you’re a math whiz like I am (yeah, right, LOL!) you can easily figure out that the finished block is 18 inches square.  I didn’t want anything quite that big so I decided to make the squares finish at ½ inch.  I started with 1-inch squares and used a ¼ inch seam throughout.  I modified the pattern slightly by using ½ inch finished strips in place of the individual squares on the outer edge of the block.  I felt that would stabilize all those tiny seams.  It also removed 68 squares from the design, but I still had to cut and sew 256 individual squares. I can't imagine how many I would have needed for my original idea!

Here are some of the cut squares and pieced rows for my flower.  I pressed the seams open to reduce bulk, but since I was using ¼ inch seams, the seam allowances met on the back.  That basically meant that I was using double thickness fabric when sewing the rows together.  For that reason, if I was going to make this pattern for any reason other than this challenge, I would use strips wherever the same color is repeated. But since the challenge was all about pixels, I decided to go with the individual squares for the center portion. 

Here is my finished Fire Flower.  It is about 10 inches square. Not all the seams match up and some of the squares are a little wonky, but all in all, I like it!


Saturday, February 9, 2019


Project Quilting  10.3  Bigger Than a Breadbox

This week’s Project Quilting challenge is size related.  It has to be ‘bigger than a breadbox’.  Which seems a little weird for a quilting project, amiright?  It turns out that the project doesn’t have to be 3D, it just has to be bigger than the footprint of a breadbox.  Which is about 8 X 16 inches. Who knew?  I haven't seen a breadbox since the last time I visited my grandparent's house.

I have to admit that I spent a few days kicking this one around in my head.  A tablerunner would fit the bill, but I started a tablerunner for the last challenge, and it didn’t work out well.  Actually, the tablerunner turned out fine; I just didn’t get it finished in time to submit it.  But I did finish it!  Yay!
Table runner that didn't get finished in time to enter into the Red/White/Blue Challenge

For this week, I first thought that I would make a fabric covered bin for my new sewing room.  Oh, I guess that I didn’t mention that yet – I have a new sewing room!  It’s a fairly long, convoluted story, that I don’t have time to get into right now, but I promise that I will post about it once it is presentable and I can take pictures. Right now, it is still in flux.  TL;DR - it used to be our family room. 

I did some digging around on the web for patterns or tutorials for fabric bins and realized that it wasn’t going to work. The fabric bins that I found were too small, or they were round. For my purposes, I wanted something like a box, not a basket.  I could have modified the instructions to make a bigger one.  But if I made something that met the size requirement for the challenge, it would be too big for the place that I wanted to use it.  So that idea went to the back burner for now.

I’ve been thinking that I needed a rug for the powder room that is adjacent to my new sewing room.  I have been seeing jelly roll rugs everywhere. Pinterest is full of them; there are tutorials online and they just seem to be the latest trend.  I had bought the pattern and a roll of the batting that is used to make them awhile ago.  But at the time that I bought the batting roll, I hadn’t read the pattern yet.  It turns out that the pattern calls for two rolls, not one…  oops.  I hadn’t gotten around to buying another roll, so it just kinda sat there.  Until now, that is!  I realized that I could use just half of a jelly roll and the one batting roll to make a smaller rug that would fit perfectly in the powder room.  Instead of an actual jelly roll, I used some of the leftover fabric from the new curtains that I made for the powder room and added some accent colors from my stash.  Voila – two birds with one stone! ^.^
My half jelly roll rug!  Approx 30" x 24"

Saturday, January 26, 2019


Project QUILTING

It’s been a really long time since I have posted anything on the blog.  Once my Scrap Addicts assignment was over, and I quit doing blog hops, there just didn’t seem to be a good enough reason.  Until now.

Somewhere in the rabbit hole that is the internet, I ran across a quilt challenge called Project Quilting. You’ve heard of Project Runway, right?  Well, this is similar, except Heidi Klum and Tim Gunn aren’t involved. And it’s for quilting projects, not clothing.  And it’s online instead of on TV.  And no one gets voted off. And no one gets a spread in Marie Clare magazine or their clothes featured at Nordstrom.   OK, OK, so it’s not really THAT much like Project Runway, but it is a challenge, and there are prizes!

Project QUILTING is the brainchild of Kim Lapacek, and she manages it on her blog, Persimon Dreams:   https://kimlapacek.com/project-quilting. Clicking on the link will take you to the page which describes the rules and prizes, etc.   

There are also some fun links with titles like “10 Reasons why to try Project QUILTING” and “10 Reasons why Project QUILTING is better than Project Runway”.  I also discovered that this is the 10th year, and there are links to all the posts from the previous years.  How did I never hear of this before?

This whole thing seemed like a great way to kick-start my quilting, which has kind of languished lately.  It seems like a lot of fun, and did I mention that there are prizes?

The first challenge that I am doing is the Red, White and Blue challenge, which runs from January 20 – January 27.  Why red/white/blue in January?  I really don’t know, but what the heck, right?  I decided that I need a new table runner for the coffee table in my living room.  I have themed ones for Christmas, Fall and Valentine’s Day, plus one that I use the rest of the year.  So I thought that my first Project Quilting challenge would be a patriotic table runner that I would use for 4th of July.

I grabbed my bin of patriotic fabrics that were leftover from when I made the Red/White/Blue Stars quilt for the 2015 Knights of Columbus International Convention and started looking for ideas. (If you want to see that quilt, I’ve got a picture posted here: http://myquiltymusings.blogspot.com/2015/07/its-done.html)

I’ve got a bookshelf full of books that I troll through for inspiration, so I turned there first.  ‘Endless Stars – Strip Pieced Quilts that Sparkle” by Jean M. Potetz jumped out at me.  I’ve had the book for quite a few years, but have never made anything using the technique she developed. 

So, thinking that I had all sorts of time, I starting cutting strips and sewing them together.  I realized that I didn’t have enough of the white background fabric, so I started digging through my scraps to see if I had any of it in my strips bin.  Nope. And I didn't want to start over. 

OK - plan B.  I could use another white on white fabric and arrange it strategically so that it wouldn’t be obvious.  Good, but not great.  Moving on….

I realized that I also didn’t have enough of the red…. Grab another coordinating red, but how to arrange it? I wasted an evening drawing out several options, then showed the drawings to my husband.  He couldn’t tell the difference between the designs because the two red colored pencils that I used were too close in value.  So I decided to just use the new red for the middle stars and leave the older one along the edges. 

By this time, it is late on Friday evening and the projects need to be done and posted by Sunday at 1 p.m. Why did I think that I had all sorts of time? 

Realizing that I am going to be way too stressed out if I keep to my original project plan, I reluctantly put it aside.  It will be finished, but not by Sunday.  I still want to participate, but there just won’t be enough time to do the table runner justice.  Plus, I need time to remember how to post things on the blog and how to link things.  So a smaller, simpler project is going to be necessary if I want to get it done. 

While I was cutting out the blocks, I realized that there was quite a bit of waste with the technique.  You stitch fabric strips together and then cut out squares on an angle.  The cut off scraps are shaped like long right triangles.  I am never one to throw away any usable scrap, so I saved them.  When I realized that the original design wasn’t going to work, I grabbed the cut-off triangles and started playing.  Sewing the hypotenuse of two different colored scrap triangles together made rectangles, which are a lot more usable to me than the triangles.  The only problem is the rectangles end up being only about 1 ½ x 3 ½ inches, and rather wonky. That’s pretty small, but I thought that I could do something with them.   I sewed them together in two rows of six each, then sewed the two rows together.  Add some batting, a backing and some stitching and voila!  A small mug rug! There are no size restrictions for the projects, thank goodness.  It’s a lot less than what I had originally planned to submit, but, hey, it’s DONE!  And with a few hours to spare!

January 2019 Project QUILTING Plan B