Project Quilting 10.4 – Pixel Play
One thing I really like about Project Quilting is that it
really gets my creative juices flowing. That's great, but in a way, it
is also a bad thing. When the project
theme is first announced, I get all these ideas running through my head. And they don’t stop when it is time to go to
bed. So, my mind races all night long, and I don’t get very restful sleep! The first few ideas are always very big and grandiose. Then the timeline smacks me on the nose and I
have to get realistic. Could I do a whole quilt in a week? Maybe, but not very likely.
This week, the theme is Pixel Play. I immediately thought that I would simply
take one of the photos that I had taken and blow it up until I could see the
individual pixels, then use a portion of it to make this week’s challenge.
On to plan B. I reread the guidelines for this week, and the phrase ‘8-bit graphics’ jumped out at me. I remembered that I had seen a website that had a bunch of quilt block patterns inspired by video games. The site is called “Fandom in Stitches” and it has patterns for all sorts of images from pop culture. The subtitle is “Multi-fandom quilt patterns, designed by fans, for fans". I can’t begin to describe the scope of the available patterns! If you are at all interested in making a quilt based on any popular show, movie or book (think Harry Potter, Dr. Who, Star Trek, Game of Thrones, Disney, etc.) go take a look. Even if you just want to admire the artistry involved, definitely check it out. http://www.fandominstitches.com/ The patterns are for personal use only. Before making or saving any of the patterns, please read the FAQs, which specify what may and may not be done with the patterns.
Not all of the available patterns would be suitable for this
challenge, but I knew that I had seen blocks for 8-bit games like Minecraft,
Super Mario Brothers and Space Invaders.
My grandson is currently nuts about Super Mario Brothers, so I chose a pattern
from that game. I decided to keep with
my original ‘flower’ idea and chose the Fire Flower pattern by Angela Pingel.
The next hurdle was size.
Many of the comments that have been posted about this challenge concern
the question of size. As I discovered
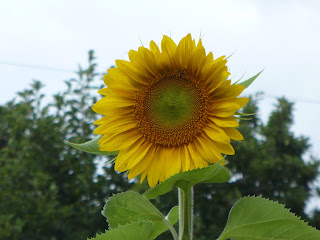
with my sunflower picture, even if you use a 1 inch square for each pixel, the
end product gets very large, quickly.
The pattern I chose was designed for 1-inch finished
squares, and the grid is 18x18. If you’re
a math whiz like I am (yeah, right, LOL!) you can easily figure out that the
finished block is 18 inches square. I
didn’t want anything quite that big so I decided to make the squares finish at ½
inch. I started with 1-inch squares and
used a ¼ inch seam throughout. I
modified the pattern slightly by using ½ inch finished strips in place of the individual
squares on the outer edge of the block. I felt that would stabilize all those tiny seams. It also removed 68 squares from the design, but I still had to cut and sew 256 individual squares. I can't imagine how many I would have needed for my original idea!
Here are some of the cut squares and pieced rows for my flower. I pressed the seams open to reduce bulk, but since I was using ¼ inch seams, the seam allowances met on the back. That basically meant that I was using double thickness fabric when sewing the rows together. For that reason, if I was going to make this pattern for any reason other
than this challenge, I would use strips wherever the same
color is repeated. But since the challenge was all about pixels, I decided to go with the individual squares for the center portion.
Here is my finished Fire Flower. It is about 10 inches square. Not all the seams match up and some of the squares are a little wonky, but all in all, I like it!


